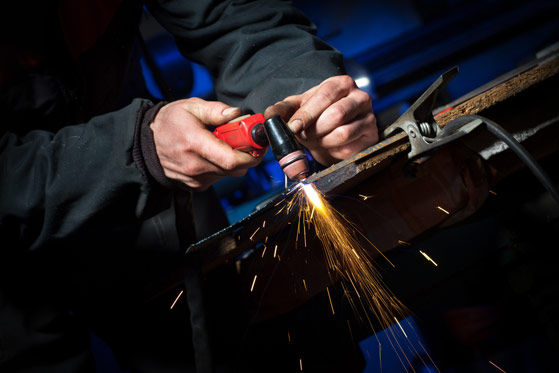
Optimizing Plasma Cutter Performance: A How-To Guide
 For the most part, plasma cutter is an easy cutting device to use; so much so that a lot of people will purchase one, rip it out of the package and use it right away! Due to this simplicity, however, a lot of people will ignore how to use this machine to its best capabilities. Here at Canaweld, we want to talk about optimizing this device to its full potential for the most successful plasma cutting results.
Before You Begin…
We know that it can be exciting to use a welding machine the second you get it, but it is extremely important that before you do anything you read the owner’s manual. Each device is designed with the same purpose, but that does not mean they are all exactly designed the same. Each machine will likely have different button/dial placements as well as certain features, so be sure to take a look at the manual to ensure a few important factors involving safety and efficiency.
How To Go About Your First Use
Once you’ve taken a look at the manual in full and know the ins and outs of your machine, it is time to get started with operating your device. Be sure to remember that although this information is helpful and likely effective, you should always follow your manuals instructions above anything else.
- Check the power cord: This is important to ensure that it’s in good condition and that it is securely plugged into its primary power supply. Certain machines may require to be plugged into a certain voltage supply, so be sure to check your manual to see what voltage that is.
- Check air supply: Be certain the proper air flow and pressure is entering the device. Air requirements should be another measurement present within your manual
- Dry air helps a bunch: Why, you may ask? Well, this air will help boost overall cutting capacity. If your machine isn’t equipped with an air filter, it’s a good idea to buy one and attach it to your machine.
- Connect the torch
- Don’t over tighten the cup: If you do this, you can end up with intermittent cutting during your welding process.
- If needed, input the right process: On certain types of machines, you will have the option to switch between gouging and cutting.
- Turn device on
- Look at the air setting
- Set output to proper setting: You can usually find a cutting speed chart on your machines manual or online
- Be sure you’re wearing all of your safety gear!
Additional Tips
When you want to ensure a clean cut, there are a few things you need to take into consideration. Those things are: travel speed, distance from the work surface, consumables and of course technique.
When working with a thicker material, always make sure to utilize a higher amp tip as a lower one is targeted to more thinner materials. If you decide to use a 40-amp tip on an 80-amp setting anyway, you will end up distorting the tip and it will need to be replaced.
If you are not using a drag shield during the process, be sure to keep at least a 1/16-1/8 inch distance from the workpiece to the tip. If you end up touching the tip to your piece, you will notice a very obvious drop in cut quality and overall consumable life.
Posture is Key
When you aren’t utilizing a drag shield, you should place your hand that isn’t holding the cutter under the cutting hand and use your hand to guide the machine down the piece. This makes for a more reliable, consistent and stable cut as the movement stays fluid and balanced. It is always recommended that you practice your movements before you begin the welding process, however. This is so that you know what to do when the machine starts up and you’ll be guaranteed a quality end product.
Travel Speed and Amps
In most cases, your device will come with a manual that compares a materials thickness to the travel speed (in inches per minute). To figure out if you are going too slow or too fast, be sure to keep an eye on the arc that is coming from the bottom of the cut. In general, you want to be sure that the arc is exiting the material at the opposite direction of travel with a 15-20 degree angle. If you are noticing that it’s going straight down, you’re going too slow. If you find that it is spraying back, you’re going too fast.
Guides
When you are marking material for a more accurate cut, use white chalk or a black marker as these methods will make it easy to see the markings when you begin to weld. If you want an even more accurate cut, you can use a placeholder piece as a guide that can be clamped to the actual workpiece, creating a straight, even edge. Before doing this, however, make sure the guide is not flammable. Aluminum will usually be your best bet when it comes to choosing a proper guide material.
Let Our Team Help
If you’re looking for the right plasma cutters to help perform the accurate and quality welding results you desire, look no further than what we have to offer here at Canaweld. With our wide variety of different welding machines, tools and safety equipment, you can be fully prepared for your next project, big or small. To find out more about our shop and our products, be sure to call us at (416) 548-5650 today!
